Facebook Pixel

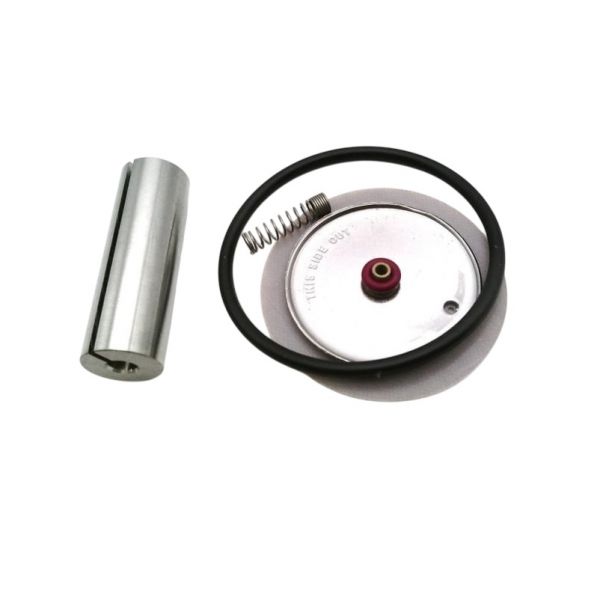
Parker-Jackes Evans 76750 Repair Kit RB9/ORB9

Special Price $103.85 Regular Price $119.43
In stock
SKU
76750
The Parker-Jackes Evans 76750 Repair Kit reconditions internal operating parts in compatible RB9 and ORB9 series solenoid valves. Installed during routine maintenance within refrigerant or liquid piping in HVAC systems, the kit provides internal diaphragms, gaskets, springs, and plunger assemblies. Replacing degraded internal components restores precise opening and closing response under system pressure. Restoring internal sealing surfaces prevents fluid leakage, maintains correct operating pressure differentials, and supports continuous solenoid valve stability across active control cycles.
https://www.partshnc.com/media/catalog/product/7/6/76750.jpg
Manufacturer Name: Parker-Jackes Evans
Product Number: 76750
OEM Part Number: 76750
Product Description: Rb9/Orb9 Repair Kit
Weight:0.24lbs/108.86g

Choose the best HVAC equipment parts and supplies from PartsHnC!

  • Same Day Shipping

  • Best Quality And Best Price

  • Wide Range of Inventory

  • Best Customer Service

Have More Questions or Need Help to Place The Order?
Reach us at (866)773-0907 or [email protected]

Write Your Own Review
You're reviewing:Parker-Jackes Evans 76750 Repair Kit RB9/ORB9
Your Rating
Customer Questions
What maintenance is required for the Parker-Jackes Evans 76750 Repair Kit?

Inspect all components before use to ensure they are free from defects or damage. Store the kit in a clean, dry conditions to prevent contamination. Use proper tools during installation to avoid damaging parts. Proper handling ensures effective and accurate equipment repair.

What are common issues with the Parker-Jackes Evans 76750 Repair Kit?

  • Missing or incompatible components in the kit.
  • Premature wear of replacement parts after installation.
  • Improper sealing leading to system leaks.
  • Difficulty during installation due to sizing inconsistencies.

Installation Steps

Step 1: Shut off system and relieve pressure before disassembly.

Step 2: Remove worn components carefully, noting orientation.

Step 3: Clean housing thoroughly to remove debris and residue.

Step 4: Install new seals and parts from kit in correct order.

Step 5: Lubricate components lightly and reassemble unit securely before sealing.

Step 6: Restore pressure gradually and test for leaks.